Mushroom Cultivation Hoses: Your Precision Misting Guide
By Hana Kim • 19th Feb

Growing mushrooms at home (whether in a shipping container, shed, or garden corner) hinges on one silent workhorse: your mushroom cultivation hose and its fungal growth watering system. Get the hose wrong, and you're wrestling with kinks, leaks at the spigot, and guesswork about water pressure. Get it right, and your substrate stays evenly misted, your caps develop without cracking, and you spend your weekend harvesting, not troubleshooting. After years in customer support, I've watched growers repeat the same cycle: grab a generic garden hose, patch it three times, then finally invest in a purpose-built system. That wasted time, and those Saturday return trips, taught me one thing: compatibility prevents returns; clarity saves weekends.
This guide maps every decision from spigot to nozzle, so you choose a humidity control hose and misting setup that works on the first try.
1. Understand Why Mushroom Hoses Differ from Standard Garden Hoses
A regular garden hose is built for volume and rough handling. Mushroom cultivation demands precision. Your substrate (whether straw logs packed in poly tubing or shelved blocks in a humidity chamber) needs consistent, fine misting, not a blast of water that compacts soil or splashes contamination onto your crop.[1]
Mushroom cultivation hoses are engineered with three non-negotiable traits:
Pressure regulation and control. Standard hoses deliver whatever pressure your spigot offers, often 40-60 PSI. Mushroom misting works best at 15-30 PSI. Too much pressure damages fragile pins and caps; too little, and your humidity stays patchy.[3] A regulated hose or inline regulator keeps your precise misting technology steady.
Contamination-free construction. Unlike irrigation hoses, mushroom hoses must resist bacterial and mold buildup inside the tubing.[2] Food-grade or medical-grade materials matter here. A hose with a smooth interior and antimicrobial properties reduces the risk that your water supply becomes a vector for competitor molds.
Flexibility and kink resistance. Poly tubing straw logs sit snug in grow rooms. Your misting hose needs to navigate tight corners, wrap around shelves, and hang from clips without kinking and cutting off water mid-spray. Hoses with a helical reinforcement and a soft outer cover excel here.[2]
2. Measure Your Space and Calculate Hose Length and Diameter
This is where most growers stumble. You eyeball the distance from your spigot to your grow zone, buy a 50-footer, and end up 10 feet short, or lugging around 40 feet of excess coil.
Here's the decision tree:
Step 1: Measure the actual path from your water source to your furthest misting point. Don't measure a straight line; count the corners, obstacles, and elevation changes.
Step 2: Choose your diameter. For mushroom misting, 5/8-inch is the sweet spot—see our garden hose diameter guide for the full flow-rate math. It balances water delivery (useful for larger setups) with manageability (lighter, easier to coil). If you're running a single poly log or small shelf, 1/2-inch works. Avoid 3/4-inch unless you're feeding multiple zones; it's heavier and overkill for misting.[3][7]
Step 3: Account for friction loss. The longer your hose, the more pressure drops at the far end. A 50-foot 5/8-inch hose can lose 5-10 PSI by the time water exits your nozzle. If your spigot runs 40 PSI and you lose 8 PSI, you're down to 32, still manageable, but not precise. Add 10 feet of length, and you're at 22 PSI.[7] Use this rule: for mushroom work, don't exceed 75 feet unless you install a booster pump.
Step 4: Add 10-15% buffer for coiling, storage, and future setup changes. A 50-foot measured run? Buy 60 feet.
3. Select Hose Material and Construction for Food-Safe, Contamination-Free Watering
Your mushroom spawn hydration system begins and ends with material choice. Three materials dominate mushroom hose applications:
PVC (Polyvinyl Chloride). PVC hoses are transparent or semi-transparent, allowing you to see water flow, sediment, or algae buildup inside the tube.[2] They're lightweight, affordable, and available in food-grade formulations that comply with FDA standards.[2] Downside: PVC can leach plasticizers (phthalates) over time, especially in warm conditions. If your grow room hits 75°F regularly, PVC gradually loses flexibility.
Reinforced rubber (natural or synthetic). Rubber hoses with embedded spiral helix construction are durable and heat-resistant, making them ideal for hot-water dechlorination loops or summer outdoor grows.[2][7] Downside: opaque, so you can't see inside; heavier to manage; and premium brands cost more upfront.
Polyurethane or braided nylon. These are lighter than rubber, flexible in cold (critical for freeze-prone regions), and food-safe when NSF certified.[2] They're a middle ground but can stiffen in extreme cold unless marketed as "cold-flex."[2]
The recommendation: For mushroom work, choose food-grade PVC or polyurethane marked NSF/ANSI 61 (for potable water safety). Verify the hose interior is smooth and resists mold growth. Avoid bargain hoses with rough interiors or unknown plastic compounds.
4. Choose Fittings and Quick-Connects That Prevent Leaks at Every Junction
This is where I wasted my own Saturdays. I'd buy a hose, screw on a connector from an old kit, and spend three hours tracking down a drip. The culprit? Mismatched thread types, wrong O-ring diameters, or brass fittings on plastic hose ends that weren't reinforced. Now I map every connection.
Thread standards matter. Most U.S. garden hoses use GHT (Garden Hose Thread), an 11.5 TPI (threads per inch) female fitting. If you're unsure, consult our garden hose thread types guide before buying adapters. But some agricultural and irrigation hoses use BSP (British Standard Pipe) or NPT (National Pipe Thread). If your spigot is GHT and you buy a BSP hose, it'll almost fit, then leak under pressure.[4]
Check your spigot first. Photograph the threads. Count the grooves, or look up your home's era and region. Older homes in the UK/EU often have BSP. New U.S. construction uses GHT.
Invest in brass or stainless-steel fittings. Plastic quick-connects and adapters degrade fast. A good brass connector with an integrated O-ring (usually EPDM rubber or silicone) costs $3-8 but lasts five years. A cheap plastic adapter costs $1 and fails in one season.[4]
Use vacuum breakers on attached hoses. Food-safety standards recommend vacuum breakers (one-way valves) that prevent backflow of contaminated water into your main supply. If your misting hose sits in standing water or near substrate, a vacuum breaker on the spigot side protects your household water.[4]
Stock washers and O-rings. Buy a multi-pack of EPDM and silicone washers in 1/2-inch and 5/8-inch sizes, plus a few spare hose-end O-rings. Keep them in a small drawer near your grow space. When a leak starts, swapping a 50-cent washer saves a 30-minute troubleshooting cycle.
5. Pair Your Hose with the Right Nozzle and Misting Head for Precision Water Delivery
A great hose paired with a cheap nozzle is like buying a sports car and using grocery-store fuel. Your nozzle controls the spray pattern, and if it's stiff, leaks, or clogs, you lose precision. For vetted, ergonomic options, see our leakproof nozzle sprayer picks.
For mushroom misting, seek a nozzle with these traits:
- Adjustable spray from mist to jet. A trigger or dial that lets you shift from fine mist (for fresh pins) to light spray (for heavier hydration of mature blocks).
- Ergonomic trigger. Mushroom growers often mist by hand once or twice daily. A trigger that's easy to squeeze for 30-60 seconds without hand fatigue matters. Stainless-steel or aluminum bodies are worth the premium.
- Anti-drip valve. When you release the trigger, the nozzle should shut completely. Chronic dripping wastes water and can pool under substrate, inviting mold.
- Corrosion-resistant body. Brass or stainless steel, never chrome-plated plastic. Dechlorinated or dechlorinating water (if you're using it to remove chlorine before misting) can corrode cheap finishes.
The trap to avoid: Coiled or twist-grip nozzles marketed as "industrial strength." They're designed for pressure washing, not misting. They deliver too much PSI and are exhausting to use by hand.
6. Install Regulation and Filtration to Protect Against Pressure Spikes and Sediment
Your spigot pressure isn't constant. Morning fills can surge to 50+ PSI; evening pressure may drop to 30 PSI. This variance kills precision misting and can damage delicate young mushrooms.
Add an inline pressure regulator. A $15-30 regulator installed right after your spigot lets you set a fixed output, say, 20 PSI, regardless of incoming pressure. This single addition transforms a chaotic spray into a controlled, consistent mist.[7] For step-by-step selection and setup, see our garden hose pressure regulators guide.
Include a simple screen filter. Mushroom substrates are sensitive to sediment and minerals. If your water is hard or your area has legacy pipes with rust flakes, a 100-micron or 200-micron screen filter keeps particulates out of your nozzle. This prevents clogs and reduces nozzle maintenance.
Install the regulator before the filter. Pressure regulators work best on the high-pressure side. Put it at your spigot, then run the hose to a filter, then to your nozzle.
7. Set Up a Simple Misting Schedule with Timers and Moisture Monitoring
Once your hose system is plumbed, consistency is the next frontier. Mushroom fruiting bodies need steady humidity, usually 80-95% RH, but not constant soaking.[8]
Invest in a basic battery-powered timer. A $20-40 timer threads onto your spigot and opens/closes your water for set durations. Program it to mist for 2-3 minutes every 4-6 hours during fruiting. This removes the guesswork and human error.
Pair it with a humidity meter. Buy a digital hygrometer for each grow zone. By correlating misting time with the humidity reading, you'll learn exactly how long your setup needs to run to maintain your target RH. After a week, you've dialed in the perfect cycle.
Use the misting schedule to diagnose problems. If humidity doesn't climb after misting, your nozzle is likely clogged or your water isn't atomizing. If humidity overshoots and drips pool, your pressure is too high or your timer is running too long. This feedback loop teaches you your system's behavior.
8. Winterize and Store Your Hose System to Prevent Freeze Damage and Extend Lifespan
Frost is silent sabotage. In sub-zero regions, follow our advanced hose winterizing guide to prevent split lines and cracked fittings. Water trapped inside a hose freezes, expands, and splits the tube from within. By spring, you've got a hose full of holes and a $60 replacement bill.
Drain completely after each use. Hang your hose vertically (or on a reel tilted downward) and let water gravity-drain. Wait 30 seconds longer than you think necessary; water can hide in fittings.
Disconnect at both ends. Unscrew your hose from the spigot and from your nozzle. Remove the nozzle and let any trapped water seep out.
Store indoors in winter. If you're in a freeze zone (below 32°F regularly), coil your hose and store it in an unheated garage, shed, or basement where it won't drop below 32°F for extended periods. Outdoor hose reels and storage cabinets insulate poorly; avoid them.
For year-round outdoor grows in cold climates, consider a buried PVC supply line to your grow zone and a heated insulation wrap around above-ground sections. This prevents freeze damage to your system's backbone.
9. Troubleshoot Common Hose and Misting Issues Using a Simple Compatibility Checklist
Problems happen. But most stem from one of four causes: wrong thread match, clogged nozzle, excess pressure, or sediment. Here's how to isolate each:
Leak at the spigot connection:
- Check the thread type (GHT vs. BSP). If unsure, photograph the fitting and search online for your home's age/region.
- Swap the washer. Nine times out of ten, a corroded or misshapen washer is the culprit.
- If the leak persists, wrap the male threads with two to three layers of PTFE (plumber's) tape before reattaching. Don't over-torque; hand-tight plus a quarter turn is enough.
Weak spray or no mist:
- Check for kinks in the hose. A single pinch collapses water flow.
- Unscrew the nozzle and run water directly from the hose end. If flow is strong, your nozzle is clogged. Soak it in vinegar for 20 minutes, then rinse.
- If flow is weak even without the nozzle, your pressure is too low or a regulator is stuck at a restrictive setting. Verify regulator output with a cheap pressure gauge ($8-15).
Hose bursts or develops pinhole leaks:
- Excess pressure is the usual cause. Check your regulator or spigot pressure with a gauge. Mushroom hoses rated for 100-150 PSI can fail prematurely if run at 80+ PSI continuously.
- UV damage is a secondary cause. If your hose sits in direct sun, cover it with shade cloth or move it indoors between uses.
Water sprays unevenly or stops mid-spray:
- Sediment is clogging your nozzle. Disassemble the nozzle (most unscrew internally), rinse each part, and check the tiny orifice for mineral buildup. Use a soft brush or cotton swab, never a wire pick.
- Your filter may be saturated. Replace the screen or backflush if the filter design permits.
10. Build Your Final System and Test Before Full-Scale Growing
Now it's time to assemble your spigot-to-nozzle map and test before you stake your entire crop on it.
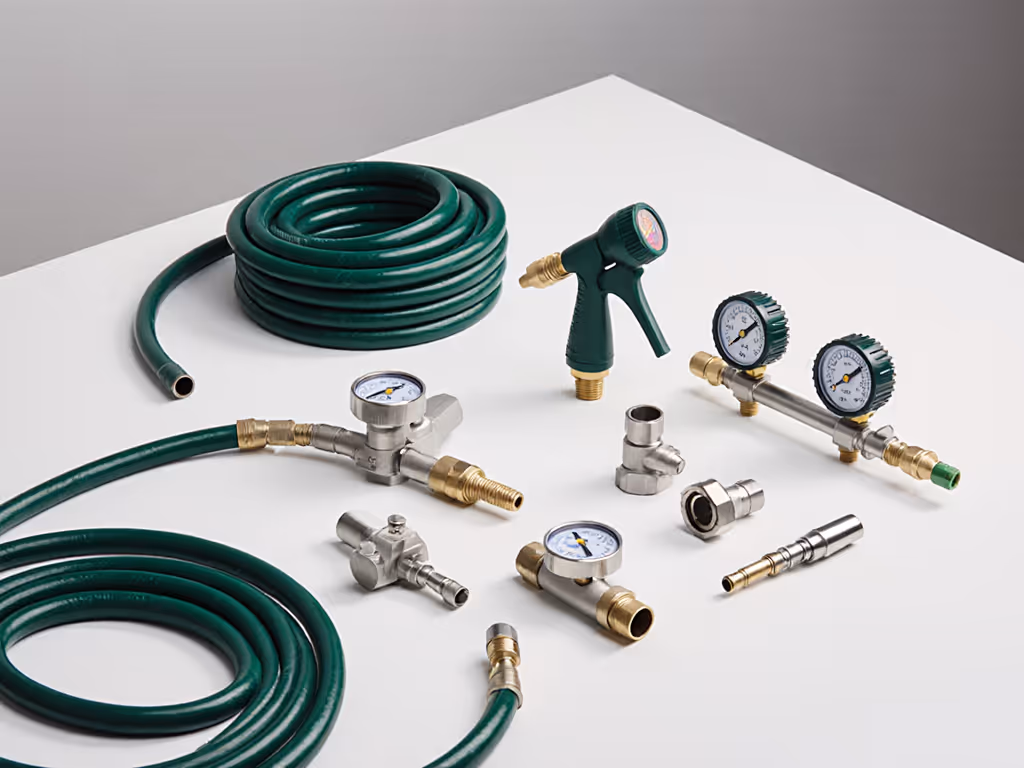
Component checklist:
- Spigot with vacuum breaker (if not built-in).
- Inline pressure regulator set to your target PSI.
- Inline screen filter (100-200 micron).
- Food-grade hose in the correct length and diameter (5/8-inch standard for mushroom work).
- Brass or stainless-steel hose-end fittings with integrated O-rings.
- Adjustable trigger nozzle or misting head (stainless steel, anti-drip).
- Battery-powered timer (optional but recommended).
- Spare washers and O-rings.
Test protocol:
- Assemble the system without your grow substrate nearby. Attach the hose to the spigot and nozzle, set the regulator to 20 PSI, and run water for 60 seconds. Check all connections for drips. Tighten any weeping fittings one-quarter turn.
- Adjust the nozzle to mist mode. Spray a towel or newspaper from 12 inches away. The water should atomize into fine droplets, not a solid stream.
- Time how long it takes to deliver one cup of water (use a measuring cup). This tells you your GPM (gallons per minute). For mushroom misting, 0.5-1.5 GPM is ideal.
- Run your timer (if using one) through a full cycle. Does the valve open and close cleanly? Does water stop immediately when the cycle ends?
- After 10 minutes of steady misting, turn off the system and let the hose drain vertically for 30 seconds. Zero drips should remain in the nozzle.
If all tests pass, you're ready to introduce misting into your grow routine.
Summary and Final Verdict
Building a mushroom cultivation hose system isn't complicated, it is just precise. You're choosing materials, threads, pressure, and components that work together without leaks, kinks, or surprises. The growers I've supported who succeed do one thing: they map out their spigot-to-nozzle setup on paper before buying a single part. They verify threads, confirm pressure limits, and test every connection with low-stakes water before their substrate is on the line.
That discipline saves weekends. It prevents returns. It turns watering from a source of dread into a calm, five-minute routine.
What to do now: Photograph your spigot and measure the actual path from water source to grow zone. Note the thread type, the distance, and the elevation changes. Then use the checklist above to select a hose, regulator, filter, and nozzle that match your space. Assemble on a dry run, test, and adjust. Within an hour, you'll have a system you trust.
Your mushrooms will reward you with even hydration, healthy fruiting, and yields that justify every penny you spent, and every minute you invested in getting it right the first time.
Related Articles